
DIY Brake Pad Replacement: Saving Money Without Sacrificing Safety

DIY Brake Pad Replacement: Saving Money Without Sacrificing Safety
Your vehicle’s braking system is arguably its most critical safety component. Whether you are navigating the dense, stop-and-go traffic of Washington, D.C., cruising the suburban avenues of Cherry Hill, New Jersey, or commuting between Wilmington, Delaware, and Newark, Delaware, reliable stopping power is absolutely paramount. Unfortunately, professional brake jobs at dealerships or independent shops can cost anywhere from $300 to $800 per axle. The good news? With a basic understanding of mechanics, the right tools, and high-quality components, DIY brake pad replacement is an accessible weekend project that can save you hundreds of dollars.
At JP Auto Hub, we believe in empowering drivers with the knowledge and the components they need to maintain their vehicles safely and economically. In this comprehensive guide, we will walk you through the technical steps of replacing your brake pads, diagnosing wear, and explaining why sourcing genuine OEM parts is critical to your success.
Understanding Brake Wear: When Is It Time?
Before diving into the mechanical process, it is crucial to recognize the symptoms of failing brake pads. Friction materials degrade over time through the conversion of kinetic energy into thermal energy. Modern brake pads are equipped with audible wear indicators—small metal tabs that scrape against the brake rotor when the pad material wears down to approximately 2-3 millimeters. If you hear a high-pitched squeal while driving that disappears when you apply the brakes, your pads are at the end of their lifecycle.
Other warning signs include:
- Grinding Noises: This indicates that the friction material is entirely gone, and the metal backing plate is gouging your rotor. Immediate replacement is required to prevent catastrophic failure.
- Pulsation or Vibration: Often felt in the brake pedal or steering wheel, this suggests uneven pad wear or warped rotors due to excessive heat cycling.
- Pulling to One Side: This can indicate a stuck brake caliper piston, uneven pad wear, or a collapsed brake hose.
Why OEM Parts Trump Cheap Aftermarket Alternatives
When it comes time to source replacement parts, the market is flooded with ultra-cheap aftermarket options. However, your safety is not an area where you should cut corners. Buying genuine OEM parts ensures that your vehicle performs exactly to the manufacturer’s strict engineering specifications.
While friction materials (the brake pads themselves) are wear items typically bought new, a complete brake job often reveals the need for replacing surrounding hardware. You might discover a seized caliper, a warped rotor, or heavily corroded mounting brackets. This is where buying used auto parts and recycled car parts from a trusted source becomes a game-changer. Instead of spending exorbitant dealership prices for brand-new calipers or settling for inferior, remanufactured aftermarket units that frequently fail, you can source high-quality, inspected, and tested OEM components.
The JP Auto Hub Advantage
Why does buying from JP Auto Hub beat cheap aftermarket alternatives?
First, aftermarket calipers and brackets often suffer from poor metallurgy, leading to premature rusting and hardware seizure. Genuine OEM parts were cast and machined to exact tolerances using high-grade alloys meant to withstand extreme thermal shock. By utilizing recycled car parts from JP Auto Hub, you are getting the exact factory component your car was built with, at a fraction of the cost.
| Feature | Genuine OEM Parts (via JP Auto Hub) | Cheap Aftermarket Alternatives |
|---|---|---|
| Fitment & Tolerances | Exact factory match; guaranteed to fit perfectly without modification. | Often require filing, shimming, or brute force to install correctly. |
| Material Quality | High-carbon steel and advanced alloys for superior heat dissipation. | Lower-grade steel prone to warping, cracking, and rapid corrosion. |
| Noise & Vibration | Engineered with specific factory shims to eliminate harmonic squealing. | Generic shims often lead to persistent brake squeal and chatter. |
| Cost Effectiveness | High value: premium factory quality at used/recycled prices. | Low initial cost, but high long-term cost due to frequent replacements. |
To browse our extensive inventory of premium OEM components, visit the JP Auto Hub Shop today.
Essential Tools and Materials for the Job
To perform a brake pad replacement safely and efficiently, you will need the following tools:
- Hydraulic floor jack and heavy-duty jack stands (Never rely solely on the emergency scissor jack).
- Lug wrench or 1/2-inch drive breaker bar with appropriate sockets.
- 3/8-inch drive socket set (metric and standard) and combination wrenches.
- Large C-clamp or a specialized brake caliper piston compressor tool.
- High-temperature synthetic brake caliper grease (silicone-based).
- Wire brush and brake parts cleaner.
- Torque wrench (capable of 50-150 lb-ft).
- DOT 3 or DOT 4 brake fluid (check your owner’s manual for the correct specification).
📹 Recommended Video
For a visual guide, search “How to replace brake pads step by step DIY” on
YouTube.
Step-by-Step Guide to Replacing Your Brake Pads
Follow these technical steps to ensure a safe and professional-grade installation. Disclaimer: If you are uncomfortable performing these steps, always consult a certified mechanic.
Step 1: Preparation and Safety
Park your vehicle on a flat, level surface. Engage the parking brake and place wheel chocks behind the rear tires (if working on the front brakes). Before lifting the vehicle, open the hood, locate the brake master cylinder reservoir, and remove the cap. Place a clean rag over the opening. When you compress the caliper pistons later, brake fluid will be forced back up into the reservoir; opening the cap prevents pressure buildup and potential seal rupture.
Step 2: Lifting the Vehicle and Removing the Wheel
Slightly loosen the lug nuts on the wheels you are servicing while the tires are still on the ground. Position your hydraulic jack under the manufacturer’s designated lifting point and raise the vehicle. Securely place jack stands under the chassis. Lower the vehicle onto the stands, ensuring it is completely stable. Remove the lug nuts and take off the wheel, exposing the brake rotor and caliper assembly.
Step 3: Removing the Caliper and Old Pads
Locate the two caliper guide pin bolts on the backside of the caliper. Using your socket or wrench, remove the lower bolt and loosen the upper bolt. This allows you to pivot the caliper upward. (On some European models, you may need to remove a retaining spring clip on the front of the caliper first). Never let the caliper hang by the rubber brake hose, as this can cause internal tearing of the line. Use a bungee cord or a piece of mechanic’s wire to hang the caliper from the suspension coil spring.
Slide the old brake pads out of the mounting bracket. Take note of the wear patterns. If one pad is significantly more worn than the other, you likely have a seized caliper slide pin.
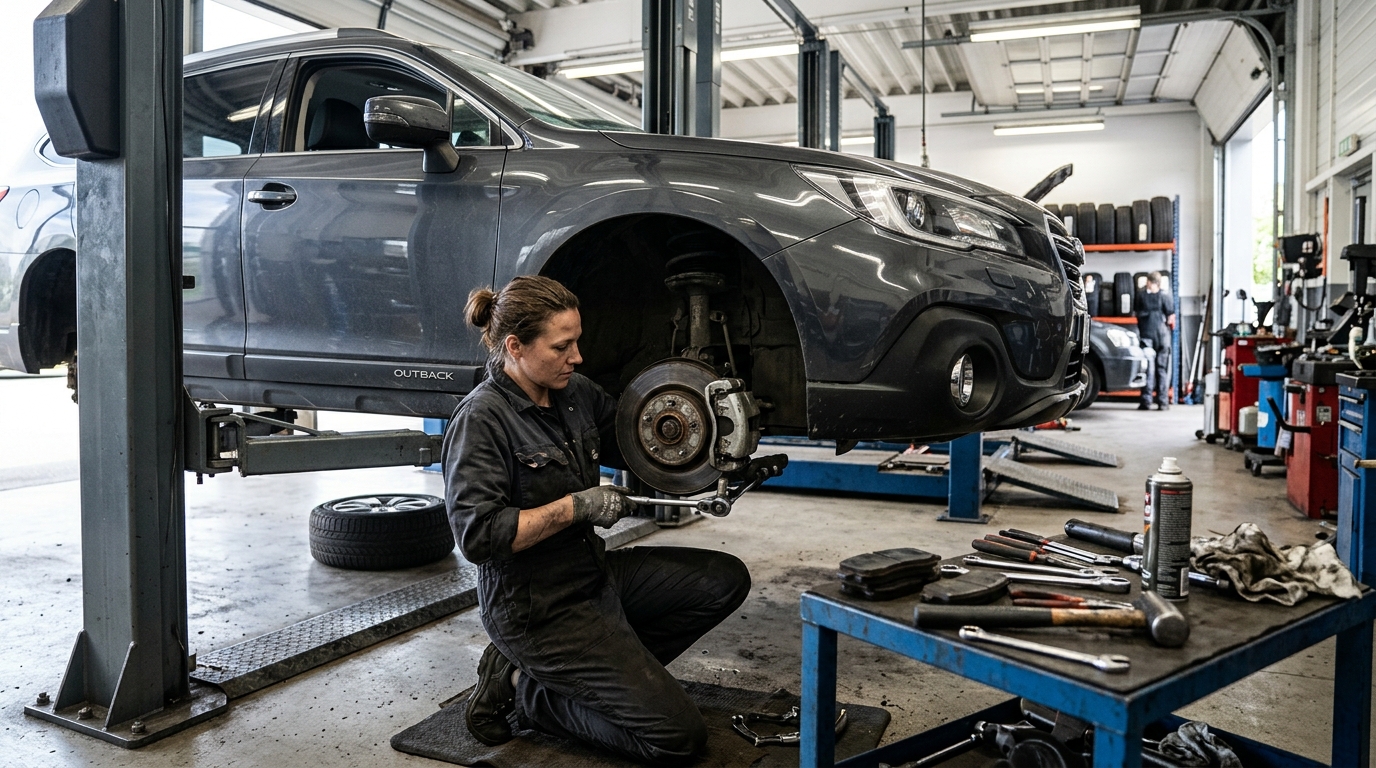
mechanic replacing brake pads
Step 4: Compressing the Caliper Piston
Because your new brake pads are significantly thicker than the worn ones, the caliper piston must be pushed back into its housing to make room. Place one of the old brake pads flat against the piston. Use your large C-clamp or piston compressor tool to slowly and steadily press the piston back until it is flush with the caliper body. Do this slowly to avoid damaging the internal hydraulic seals and to allow the fluid time to travel back to the master cylinder.
Step 5: Servicing the Slide Pins and Hardware
This is the step most amateur DIYers skip, leading to premature pad failure. Remove the metal abutment clips (hardware) from the mounting bracket. Use a wire brush to clean any rust and brake dust from the bracket channels. Install the new stainless steel clips provided with your new pads.
Next, pull the caliper slide pins out of their rubber boots. Wipe off the old, degraded grease with a rag and brake cleaner. Apply a fresh, generous coat of high-temperature silicone brake grease to the pins and reinsert them, ensuring they slide in and out smoothly.
Step 6: Installing the New Pads and Reassembly
Apply a very thin layer of brake grease to the back of the new brake pads (the metal plates) and to the “ears” that slot into the mounting bracket. Never allow grease to touch the friction material or the rotor surface. Slide the new pads into the bracket.
Swing the brake caliper back down over the new pads. Insert the guide pin bolts and tighten them to the manufacturer’s torque specifications (usually around 25-35 lb-ft). Double-check that all bolts are secure.
Step 7: Reinstalling the Wheel and Finalizing
Place the wheel back onto the hub and hand-thread the lug nuts. Lower the vehicle off the jack stands. Using your torque wrench, tighten the lug nuts in a star or crisscross pattern to the factory specification (commonly between 80 and 100 lb-ft).
CRITICAL STEP: Before putting the car in gear, pump the brake pedal several times until it feels firm. Compressing the pistons created a gap between the pads and the rotors; pumping the pedal pushes the pistons back out. If you forget this step, you will have no brakes the first time you try to stop!
Finally, check the brake fluid level in the master cylinder reservoir. Top it off with fresh fluid if necessary, and securely replace the cap.
The Bedding-In Process
To ensure optimal performance and prevent squealing, new brake pads must be “bedded in.” This process transfers an even layer of friction material onto the surface of the rotor. Find a safe, open stretch of road. Accelerate to about 40 mph and apply moderate brake pressure to slow down to 10 mph without coming to a complete stop. Repeat this 4 to 5 times. Then, accelerate to 60 mph and apply firm brake pressure to slow down to 15 mph, again without stopping completely. Repeat this 2 to 3 times. Drive around normally for a few minutes to let the brakes cool down. Your new brakes are now ready for daily driving.
Sourcing the Best Parts in the Mid-Atlantic
Tackling a brake pad replacement is a highly rewarding DIY project that demystifies your vehicle’s mechanics while keeping your wallet full. Remember, the key to a successful and safe repair lies in the quality of the components you use.
Whether you are fixing up a commuter car in Newark, Delaware, or maintaining a family SUV in Washington, D.C., JP Auto Hub is your premier destination for top-tier automotive components. By choosing genuine OEM parts and high-quality used auto parts, you guarantee the safety and longevity of your vehicle without falling victim to the pitfalls of cheap aftermarket knockoffs.
Need assistance finding the correct caliper, bracket, or OEM hardware for your specific make and model? Our team of automotive experts is ready to help. Contact us today and let us equip you with the right parts for your next DIY project.





Copyright 2025 © J&P All right reserved. Powered by IzyoX
